


How to Use a Grade Laser
Laser levels, also commonly referred to as construction lasers, have become essential on construction sites for everything from simple layout to complex grading.
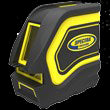
There are three main types of construction lasers:
- Dot lasers: project a single point used for plumb or alignment
- Line lasers: project horizontal or vertical lines across surfaces
- Rotary lasers: project a full 360-degree laser plane over large distances
The rotary lasers are ideal for outdoor work. And when your project involves working with slopes, a grade laser is the tool to use.
In this guide, we will walk through how to use a grade laser for setting slopes and elevations in real-world conditions, explain the tools you need, and show how to achieve consistent grading results on your jobsite.
What is a Grade Laser?
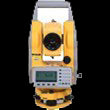
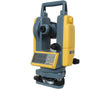
A grade laser, also known as slope laser, is a type of rotary laser that can tilt to match a specific grade or slope (known as grade fall) on one axis (single slope) or two (dual slope) over long distances.
Depending on your requirements, you may opt for either manual or automatic grade laser with single or dual slope capability. Manual grade lasers require users to set the slope physically and align the laser beam manually. While automatic grade lasers calculate and maintain the slope electronically.
Single Slope Grade Laser
A single slope laser lets you tilt the laser beam along one axis—typically the X-axis. This is perfect for straightforward grading jobs such as driveways, parking lots, or single-direction drainage.
Dual Slope Grade Laser
Dual slope lasers allow independent slope adjustment on both the X and Y axes. This gives you more flexibility for complex site work, such as sports fields, multi-direction drainage systems, and compound grading.
Common Applications of Grade Lasers
Grade lasers are commonly used for construction jobs such as:
Drainage and Trenching
Whether installing stormwater systems, sewer lines, or underground utilities, grade lasers ensure proper flow by maintaining a consistent slope—often between 0.5% and 2%. Dual slope lasers are especially useful when laying pipes in two directions from a central point.
Roadwork and Driveways
Grade lasers are used to control subgrade and final grade elevations when building roads, parking lots, or long driveways. Single slope lasers are ideal for establishing uniform fall along one direction.
Building Foundations and Pads
Before pouring concrete, contractors use grade lasers to check that excavation and fill levels are accurate across the foundation area. This helps prevent low spots or high corners, which could lead to costly rework.
Landscaping and Grading Yards
For proper site drainage and aesthetic contours, landscapers rely on grade lasers to shape terrain with accurate elevation drops, berms, and slopes—even over large, uneven lots.
Athletic Fields and Sports Courts
Dual slope lasers are often used to grade complex surfaces like baseball fields, soccer pitches, or tennis courts—where precise slope in multiple directions is required for water runoff and performance.
Required Survey Accessories
To properly set up and operate a grade laser, you will need these essential tools:
- Grade Laser
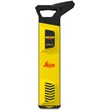
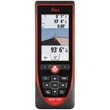
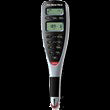
- Laser Receiver: mounted on a rod to detect the beam
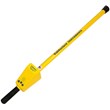
- Grade rod: for measuring height differences at various points across the jobsite.
- Tripod: flat-head tripod with combi feet or pointed feet.
- Remote control optional: for adjusting slope or settings.
- Target Plate optional: to help locate the beam quickly at setup.
Check out these grade laser packages offered by Tiger Supplies or build your own laser package.
How to use a Grade Laser (Step by Step)
Whether you are using an automatic or manual grade laser, accuracy begins with a stable setup and a reliable reference point. Here is how to operate each type effectively.
How to Use a Grade Laser in Manual Mode
- Set up the tripod securely Place the tripod on firm, level ground. For outdoor use, choose a tripod with pointed steel feet that can be driven into the soil for added durability.
- Mount and level the laser Attach the grade laser to the tripod and aim it in the direction of the desired slope. Power it on and allow it to self-level. Once leveled, the laser will begin rotating and projecting a horizontal beam.
- Switch to manual mode Activate manual or grade mode using the control panel or remote. Refer to your user manual for the exact steps, as the process may vary by model.
- Mark your reference level Determine the required grade fall (e.g., 1 in 60 or 1.667%) using a grade chart. Measure out a fixed distance (e.g., 6 meters) from the laser and place your grade rod and receiver there. Slide the receiver along the rod until it detects the level laser beam - indicated by a continuous beep - and mark this position as your reference point.
-
Calculate and apply the grade fall Lower the receiver by the required fall amount. For a 1 in 60 slope over 6 meters, this would be 100mm. Mark this new position on the rod.

- Tilt the laser beam manually Using the up/down slope adjustment buttons on the control panel or remote, slowly tilt the laser beam until it aligns with the new receiver position (at the lowered mark). A steady beep will confirm alignment.
- Reset the receiver to the original level mark Slide the receiver back up to the reference level marked in Step 4.
- Start grading Excavate or fill soil at the current location until the receiver (set at reference level) picks up the newly tilted laser beam - again confirmed by a continuous beep.
- Continue grading across the site Repeat step 8 at each point along your grading line to maintain a consistent fall set by the laser.

How to Use a Grade Laser in Automatic Mode
If your laser has automatic slope functionality, the process is faster.
- Set up the tripod securely Place the tripod on a stable ground. For outdoor use, choose a tripod with pointed steel feet or use a tripod stabilizer for added durability.
- Mount and level the laser Attach the grade laser to the tripod, aim it in the slope direction, and turn it on. The laser will self-level and begin projecting a beam.
- Find the reference beam At your reference location, raise or lower the laser receiver on the grade rod until it detects the level beam. This becomes your baseline elevation.
- Input the desired grade Using the control panel or remote, enter the required slope (e.g., 2.00%). The laser will automatically tilt its beam to match the specified fall. Once complete, the system may indicate readiness with a beep or a message.
- Begin grading At the next measurement point, move the rod up or down (or adjust the soil level) until the receiver again detects the laser beam. This confirms you are matching the programmed slope.
- Repeat as needed Continue moving along your grading line, adjusting elevation to stay aligned with the laser beam, ensuring a consistent slope across the site.
Tips for Accurate Results with a Grade Laser
Below tips ensure that your grade laser delivers reliable as well as consistent results.
Start with a Solid Setup
Any movement can throw off the laser's reference plane and lead to elevation errors. For soft or uneven surfaces, use a tripod with pointed feet or a tripod stabilizer to prevent shifting during use.
Use a Benchmark or Known Elevation
Always start your measurements from a fixed reference point. This gives you a consistent baseline to check against as you move across the jobsite.
Check Calibration Before You Start
Some lasers have built-in calibration checks, while others require you to verify with external levels or known grades. Either way, calibrate the laser before every major setup, especially if it has been transported or bumped.
Use Fine Mode or High Sensitivity Settings
If your receiver supports it, switch to "fine" or "high accuracy" mode for high-tolerance work. This improves precision, especially during foundation pours or critical slope applications.
Protect the Receiver from Glare
Direct sunlight can make it harder for the receiver to pick up the laser beam. Shield the sensor with your body or work during lower-light hours for easier detection.
Recheck after Movement
Recheck level and slope settings if the tripod is bumped or the laser is nudged during the job. Even minor shifts can affect accuracy over long distances.
Lock in Slope Settings
Once your slope is dialed-in, lock the settings on your laser or remote. This helps prevent unintentional changes during the course of the job.
Troubleshooting Common Grade Laser Issues
Even with proper setup, you might occasionally run into problems. Here is how to solve the most common grade laser issues on the jobsite:
Laser Receiver won't Pick up the Beam
- Check battery levels on both the laser and the receiver
- Verify the laser is spinning and not paused or in standby mode
- Make sure the receiver is set to the correct laser mode
- Try moving closer to the laser - you may be out of range
- Avoid direct sunlight - it can interfere with detection
Laser is not Leveling
- Ensure the tripod is on stable, even ground
- Check if self-leveling is enabled (for auto models)
- For manual lasers, adjust the bubble vials until level
Slope Settings won't Hold
- On automatic models, lock the slope settings after inputting
- Check for tripod movement or vibration - this can disrupt slope output
- If using a remote, then make sure it is properly paired
Laser Beam seems Weak or Not Visible
- Clean the laser window - dirt or dust can obscure the beam
- Try using the target plate or receiver instead of relying on the visibility
- Bright outdoor conditions may require a higher beam intensity setting
Safety Tips when using a Grade Laser
Grade lasers are generally safe to use but follow these safety practices to protect the crew and equipment.
Know the Laser Class
Most construction-grade lasers fall under Class II or Class IIIa, which are safe to use when handled correctly. However, never look directly into the laser beam or point it at others, even if it is labeled as "eye-safe".
Use Eye Protection if Needed
While laser beams used in grade lasers are usually low power, prolonged exposure or accidental reflection into the eyes can cause discomfort or temporary blindness. Use laser safety glasses if you work near the beam of extended periods (especially indoors).
Avoid Reflective Surfaces
Mirrors, glass, or even water can reflect the laser beam unpredictably. Avoid placing the laser near reflective materials to prevent accidental eye exposure or measurement interference.
Protect Equipment from Weather and Impact
Use rain hoods or carry cases in extreme weather, and avoid dropping or over-tightening mounts that can knock them out of calibration.
Turn off when not in Use
To preserve battery life and prevent unauthorized use or tampering, turn off the laser when it is not actively being used. Some models have a standby mode for convenience.
Grade lasers take the guesswork out of slope and elevation work - whether you are laying pipe, prepping foundations, or leveling large work areas. Knowing how to set up and use your grade laser properly not only improves accuracy but also saves time, reduces rework, and keeps your crew moving efficiently.
Need help finding the right grade laser for your next project? Contact our product experts or explore our full collection of grade lasers and accessories to get started with.